This post is sponsored by Masters
I have spent much of this year looking for a place to move to. Just weeks ago, I found the place. Or it found me. It doesn't really matter which. The answer was, like usual RIGHT HERE.
So simple, but it took me the good part of a year to work out I don't really want to move. Instead, what I want to do is make some changes at home. Plant the trees I should have planted three years ago and do a few jobs around the house to make what I have already, the place I want to be.
The team from Masters sent me an email asking if I had any jobs around the house I was thinking of writing about, and, well, yes - YES I DO.
I have so many that I didn't really know where to start. We logged in online for about 3 seconds and then just jumped in the car, Mr H and the girls already frequent Masters quite often, the girls knew the trolley they wanted and the park area AND the Macca's item they would beg for.
I got side tracked by so many things. When I start looking I get ideas for nearly every room of our house. But I decided to start with something simple, something that didn't need too much planning, just a free weekend.
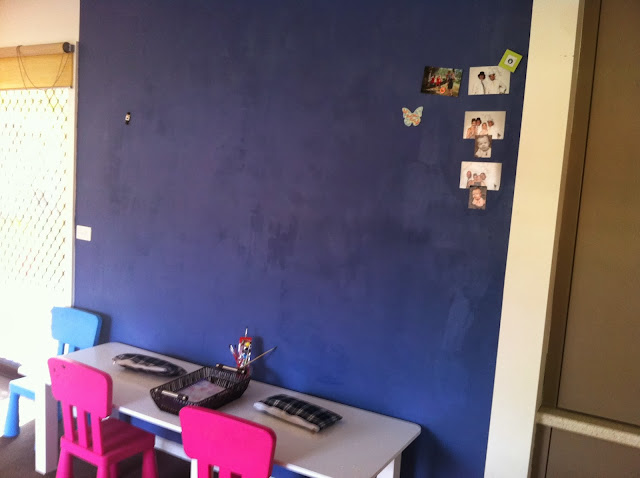
Our craft wall has been getting more and more wrecked. It is splattered with paint and texta and crayon. The table is totally trashed and scribbled all over in permanent markers and pens and the artwork wire is sagging from too many pictures that MUST be kept.
I have been wanting to clean up this area for weeks.
I decided that it would be excellent to turn the wall into a giant magnetic chalkboard wall. This way I can use magnets to put up the artwork and also use the wall to write in if I need to - or let the girls write on it and then easily clean it off.
If you want the super fast way to see what I did, then here is a little photo log, I even added music because Popps showed me how, (it's my first ever vimeo, be kind).
MAGNETIC CHALKBOARD PAINT from Clairey Hewitt on Vimeo.
All you have to do is paint on the magnet paint (three coats are recommended) and then paint on the chalkboard paint. DONE.
Of course any little DIY project is a little harder than that, because Better Homes and Gardens have fooled us all and nothing is really that easy.
But, lets go back to the start:
You can buy the magnetic paint from Masters and the staff there will tell you exactly the amount that you need for the size that you are painting. We used this one.
Pick the chalkboard colour that you like. We chose from the Wattyl range, but there are others there too. Wattyl had these colours and I thought I said the green but both Mr H and Popps both swear that I said I wanted Mantra, so that is what they got me when they returned to Masters to get everything we needed.
Back at home. I was clearing away the
These are the things we got from Masters for this job:
After the wall was given a good clean I got busy with the green frog tape, this is decent tape for painting, and I used it to stick the drop cloth to the floor too, plus some of the gorilla tape just for good luck. It must have worked as my drop cloth didn't budge and my floors are safe.
 |
| Me very happy with my green frog tape. |
Next I got started with the magnetic paint. This paint is not like normal paint. I tried to give it a stir and couldn't even get the stick through the paint. It is like a very heavy sandy sludge and takes a fair bit of elbow grease to get this mixed. I am not all that strong, so it took me around 20 minutes to get this paint mixed. Mr H helped me with the next tins and was much faster.
Apparently before he left Mr H told me to use the foam roller. Which I misheard as don't use the foam roller. If you don't use a foam roller you will find that the sludge flicks everywhere. All over your house and in your hair and on your face and on the ceiling.
Tip 1: Use the foam roller.
Magnetic paint is really messy. Once you have the foam roller you will still find that bits of sludgey dirt specks are rolled on to the wall.
Tip 2: Be prepared for magnetic paint to roll on quite roughly. It doesn't give a smooth finish.
I followed the tips on the tin and did three coats of this paint.
Tip 3: More coats are better, make them thinner rather than big thick coats of paint.
The following day, after giving the magnetic paint over 24 hours to dry and checking that the magnets stuck I started on the chalkboard paint.
 |
| IT STICKS! A magnet on our plasterboard wall. |
The chalkboard paint is just like normal paint.
You can stir it very easily and one can of paint goes a lot further. According to the size of the wall we only needed the one can, but I found the roller (normal not foam) soaked up the paint quickly and I would have liked more paint.
We painted this wall together and we were really happy with the final result.
While we were waiting for it to dry Mr H and the girls were also busy sanding and painting our craft table. We used things we already had in the shed for this and did not make any purchases. (The sander thingo and sanding triangle bizzos we had).
After two coats of the chalkboard paint were finished and dry we were really keen to test out our new wall. The magnets were sticking and we really wanted to get it finished for the day.
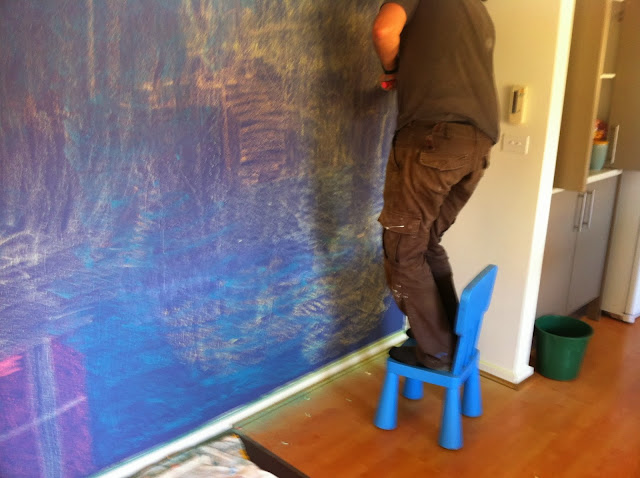
Before you use a chalkboard you need to chalk the board.
That is when you use the side of a piece of chalk and go all over the board to prep it for future use.
This is a very messy process and you should NOT remove your drop sheet before you do this, which is what I did.
Tip 4: LEAVE YOUR DROP SHEET IN PLACE UNTIL THE VERY END.
Use the biggest chalk that you can find, the type used on the footpath is best, we had this really colourful stuff already.
Then you need to dust it off as good as you can, give it a good rub all over.
Tip 5: Have lots of clean rags handy when doing this project.
It took me quite awhile to clean up this wall and once I did, it wasn't looking as flash as it was before we did this. I got googling and read the brochure from Wattyl which suggests you wait 48 hours for the paint to dry BEFORE you chalk the board.
Tip 6: Wait 48 hours for the paint to dry before you chalk the board!
Due to the magnetic paint being quite rough underneath, our chalkboard wall is also quite rough. Mr H tested it with a very light sand but the magnet paint comes through very quickly.
We are happy with the look of the wall, but we will most likely give it an extra coat of chalkboard paint in a few months. We will just live with it for a bit to see how we like the new colour, how we use the wall and how hard it is to clean.

This area is located in an open room, that is both our kitchen and living area so we look at it all the time. The end result is a much more colourful, brighter and more useful area.
If you would like to keep up with anything else from Masters, you can catch them on facebook or twitter or if you prefer more visual, give Youtube a go.


.JPG)


